K3S - Initial Impressions
This review first appeared on eHam.net
This is a "first impressions review" of the new Elecraft K3S radio. I am coming into this radio from a Kenwood TS990S which I recently sold. I will say that I was a big fan of the big Kenwood radio; however, due to space constraints I had to sell the Kenwood. I selected the K3S for a number of reasons including the great reputation of the K3, the support that Elecraft provides its customers, and because I wanted to buy American. I will be referring back to the TS990S during this review for comparison purposes which I hope will be interesting to most folks.
First a little info on my station setup:
Radio: K3S equipped with: 100W upgrade, ATU, TCXO 0.5ppm, FM/2.8/400Hz/250Hz 8 pole filters Gen Coverage RX, Digital Voice Recorder, Ext 10MHz ref input, 2nd Receiver with 2.8 8 pole filter
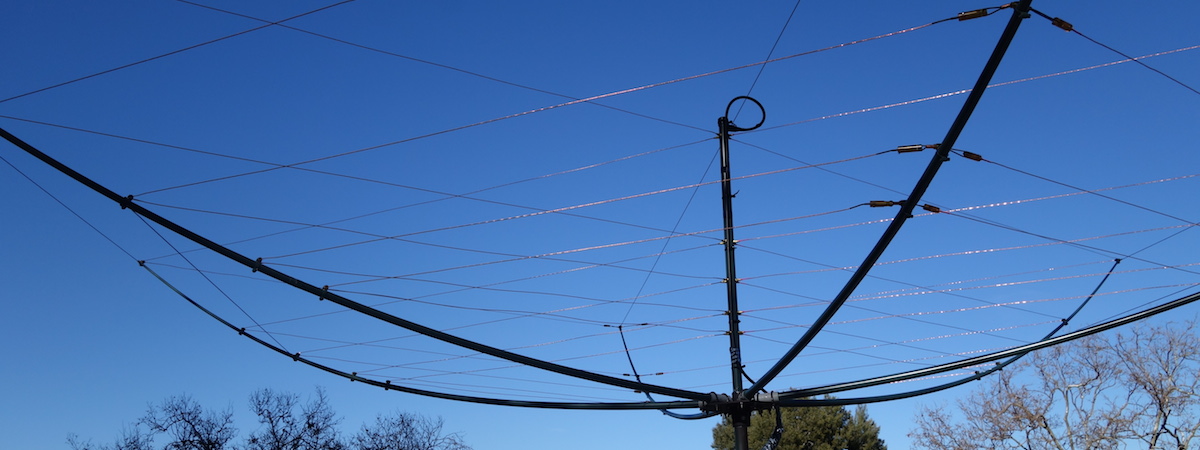
Antennas: Traffie 5 band Hexbeam at 35ft, ground mounted Steppir BigIR vertical with 42 radials - used primarily on 40m & 6m .
Amplifier: Expert 1.3K-FA solid state linear amplifier (I also reviewed this here on eHam)
Panadapter: QSR1 SDR connected to the K3S's RX-OUT via a Stridberg MCA102M multicoupler and a DX Engineering Receiver Guard 5000. I also got the P3 that I am running alongside the QSR1. I will review this separately.
You can read more about my setup at http://w9tvx.com
I should also add that I am operate primarily Voice and Data modes specifically: PSK, JT65, RTTY, Olivia. I am NOT a CW operator.
I think I can summarise my review with one word: Surprise. I was surprised on a number of fronts with the K3S - but to be fair, I only have a couple weeks operation under my belt.
Coming from the Kenwood with its dual screens and extensive physical front panel, I was seriously concerned that the K3S would be an ergonomic nightmare. After all, many of its buttons and knobs serve two, and sometimes three purposes. The radio is also significantly smaller than the TS990S leading to concern that it would be extremely fiddly. Also, instead of a nice large colour touchscreen and a secondary display, the K3S has a small monochrome display. To be sure, for the first couple of hours as I sat in front of the radio reading through the manual, while playing with the various features, I wondered if I had made a horrible mistake. Then a funny thing happened: Things just started to make sense. There is a wonderful cohesiveness to the radio, and in the short time that I have had it, I have had many moments when I have thought to myself: "wow that's cool" or "that's well thought out"
Let me provide a couple of examples:
I wanted to set up my microphone with the radio. As part of the setup I would like to set the mic gain and compression, as well as the transmit equaliser. When doing this, I don't want to actually transmit. In most cases what you'd do is attach a dummy load to one of the antenna ports and test away. With the K3S, there is a really convenient test mode. Put the radio into this mode by a simple button press and the radio behaves exactly as if you are transmitting. There is even an intutive indicator to let you know that you are in test mode.
Another example is that normally you have to use the band buttons to cycle through the different bands. So if you are on 12m and want to get to 40m, you have to cycle through several bands to get to it - Yes you can set up memory locations, but they take you to a specific location on the band, and I may just want to return to the prior location at which I was. On the TS990, there are dedicated band buttons for each of the bands, so you can directly punch in the band to which you want to go. The radio has a ton of front panel real estate, so there is plenty of room for this. However, with the K3S there is a way to get this functionality by setting the 0-9 memory config option to band select. With this mode enabled, you can directly decide which of the keypad buttons selected which band. For example, I have keypad 1 at 40m, 2 at 30m, 3 at 20m etc. To get to the last frequency at which I was tuned on a given band, I need only press the M>V button and the corresponding keypad button. Is it as direct as on the TS990S? No, but it is effectively as good and really no slower. One other nice feature on band selection is that if you do like cycling through the bands using the band buttons, you can configure the bands that you want to include. So far example, if you don't work 160m or 6m, you can simply elect for them to be disabled. My point is that the K3S allows you to configure it to fit your operating style.
One of the nice features of the TS990S is its menu system. It is really easy to navigate and configure because of the nice large screen tha can display lots of descriptive text about each menu item. In addition, you can see a large chunk of the menu tree. One of the criticisms of the K3S is that the menu system is complicated and hard to use. As a caveat, I will confess that I am a computer geek, so menu systems and settings don't intimidate me. I recall reading many a post on the various forums that would claim that most of the K3 menu items are set and forget, and to be honest I was a tad bit skeptical. After all, K3 owners are known to be a little zealous about defending their radios. Having worked through the K3S menu system I will say that while there is no question that it is easier to navigate and set menu elements on the 990S; it is actually true that in many cases on the K3S, menu items are set and forget. Furthermore, if you take the time to read the manual and spend time with the radio, you will discover that things are for the most part laid out logically. There is even help for each menu element by pressing the DISP key while viewing the menu item. This is fine in a pinch or for a reminder, but is no substitute for referencing the manual.
Another nice feature of the KS3 is that is supports both a USB and an RS232 port for CAT data via the KIO3B module. Previously the K3 only supported an RS232 port, and you'd have to use a device like Signalink for digital modes. By using the USB port to connect to a computer, you also get a built-in sound device mitigating the need for a third party solution. This was one of the features that I loved about the TS990S, and was a key factor that pushed me to move on the Elecraft.
There is however an issue that I have with the new dual port solution, and that is that you really don't get two ports. on the TS990 (and 590 for that matter), you get both an RS232 and a USB port that can operate separately. On the K3S, only one of the ports can be active for CAT TX and RX data (I should note that you can still connect a computer to the USB port and a P3 panadapter to the RS232 port.) The reason for this I was told is that the K3 MCU only has one serial i/o channel to the KIO3B module. The reason this was an issue for me is that on my Kenwood I would use the USB port to connect to my PC, and the RS232 port to connect to my Expert 1.3K-FA amplifier. The amplifier would use the connection to poll the radio for frequency data that it uses to continually look up the best values for the antenna tuner allowing for automated operation. In the words of Homer Simpson, this was a "Doh" moment for me.
As I stated earlier, Elecraft's reputation for customer service and support was one of the deciding factors in my purchasing this radio, so I decided to put it to the test. I looked up the email address of one of the cofounders (Wayne Burdick) and shot him an email with my issue. Within a couple of hours, I received a response from Wayne being honest about the issue and telling me he would have someone from engineering reach out to me to see if we could find a workaround. About an hour later I was in an email dialog with an Elecraft engineer. He advised me that while there could only be one TX channel, RX data (e.g. frequency data) was transmitted to both ports. We had a few more email exchanged and came up with a solution which I tried out and which worked such that the amp was happily following the radio's VFO.
All I can say is that without question Elecraft absolutely deserves its reputation as a customer focused company. No way could I expect this kind of response from one of the big three.
I would like to spend a little time talking about operating the radio on different modes. I should take a few sentences to describe my operating setup.
My primary software platform is HRD 6.2. I have a virtual com port pair that I use for connecting N1MM+ to HRD when contesting. I also have HDSDR talking to HRD via a DDE linke (built into HDSDR) which gives me an excellent panadapter capability via a QSR1 SDR (connected to the K3S via RX-IN/RX-OUT as described earlier). So I am able to click to signals in HDSDR waterfall, and HRD will set the radio to the appropriate frequency. I also have a P3+SVGA, because I'm into overkill. For digital operations, I use DM780 for PSK/Olivia/RTTY and WSJT-X/JTALERT-X for JT65/JT9 digital modes. I am not a CW operator which I know and admit is shameful.
Much has been made about the harshness of the K3 audio. Again this was an area of significant concern for me when purchasing the radio. To be fair, this is one of those areas which is highly personal, and what may be acceptable or even pleasing to my ears may be grating to another’. In my case, I found it imperative to spend some time tweaking the RX equaliser for the different speakers that I use with the radio. Having done that, I feel that the audio is not at all fatiguing to listen to.
In operating the radio in phone, I discovered that I spend the majority of my time using the passband filter knobs to tune out adjacent stations with an exponentially smaller amount of time spent using the notch filter, NR, and NB facilities (As an aside, I do find that I miss the TS990s Band Elimination Filter in some cases). I found the K3S to integrate very well into my software platform, as well it was very easy to operate. There were some features that I missed from my TS990, such as the ability to visually see the notch filter location in the passband, the actually passband LO/HI cutoff values at all times etc.
One thing that I do not like about the K3S is the VFO-A knob. When I compare this to the Kenwood knobs, it feels awful. In particular, the way the tuning resistance is provided by using felt pads feels... well like two felt pads rubbing together. I know that this is probably lightweight and the radio is used on DXExpeditions; however, there must be a better way solution
As far as digital modes go, the only mode that I have worked so far is JT65. Putting the K3S into the appropriate data mode involves pressing the mode button until the radio is in DATA mode, and then long pressing the AFX button to enter a data submode at which point you can rotate the VFO-B dial to pick the desired data mode. The K3S provides a number of options for digital communications including onboard decoding of CW/RTTY/PSK signals. In my opinion the USB port on the KIO3B really shines here, because you get a built-in soundcard, so no need to have any external devices like a Signalink. The K3S is also smart about its settings when in data mode. For example, when in DATA A, compression is disabled, mic gain switched to line in, and the TX equaliser is set to flat. This last feature made me jump for joy, because a pet peeve of mine with the TS990 is that it would not set the TX equaliser to be flat in data modes, and I would always have to remember to switch it off. Invariably I wouldn't until I saw the signal display on first transmit.
There are a couple of features that immediately come to mind and that I'd like to see after my couple weeks of operation:
The ability to to save and recall multiple audio profiles. By audio profile I mean RX & TX equaliser settings as well as microphone gain and compression settings. I switch between a Kenwood MC-90/Klipsch speakers and a Heil Proset depending on if I am ragchewing or contesting. Each of these setups requires a different audio profile. Currently I have to manually go in and setup each element of the profile each time I switch. One idea would be to add a menu option to save/recall audio profiles. Then long pressing a keypad digit would save the current profile, and tapping it would recall it. Bonus points for being able to name the profile on saving. Also bonus points for being able to assign the menu item to a PF key such that tapping the PF key will cycle through the saved profiles. Now having written all this, I'm sure someone will tell me that this is already possible!
The ability to quickly recall current settings. By this I mean: The current passband, the location of the notch filter, mic gain and compression settings. Personally, I would like it if a second tap of the DISP button would provide the ability to see this kind of data.
View the notch filter on the P3 display. One of the nice features of the TS990S is the ability to visually see the where the notch filter is located on the passband. This is really handly as you can visually tune it to the location of the interference. If this could be displayed on the P3 it would be wonderful. The scenario would be that you'd set the SPAN to a small value such that you could clearly see the location of the interference, and then tune the notch filter to suppress it. Not sure even if this is possible, given the hardware architecture, but it would sure be nice. While we are about it, the P3 already displays the passband and changes to it in realtime. Why not have it also display the passband low/hi/shift/width values - if only when they are being changed?
Ability to be able to lock the Compression+Mic and Power settings separately. The rationale for this is that once I have my gain and compression set for a given operating mode, I am unlikely to change it while I am far more likely to change power. It is quite easy to accidentally reach for the MIC knob when intending to turn the PWR knob in the heat of battle - at least for this operator - which can be quite annoying.
In summary, in the short time in which I have owned this radio, I am very pleased it. Overall the K3S is a worthy upgrade to the K3, and the best part is that K3 owners can, overtime, upgrade their radios with whichever capabilities of the K3S that they desire. Having said this, the K3S is not a cheap radio. My setup cost almost six thousand dollars and, to be honest, when you take the radio out the box and look at it, you think to yourself: "This sure doesn't look like six grand worth of radio". It is in no way as impressive looking or feeling as a TS990: The buttons are rubber, the VFO knob has a crummy tactile feedback, and the screen is small and monochromatic. But turn it on and operate it, and you realise that this is a very special radio that does all the important things very very well. In this operators humble opinion thus far it is worth every penny that was paid for it.
I will definitely write a follow-up review after a number of months of usage to see if the blush has worn off.
This is a "first impressions review" of the new Elecraft K3S radio. I am coming into this radio from a Kenwood TS990S which I recently sold. I will say that I was a big fan of the big Kenwood radio; however, due to space constraints I had to sell the Kenwood. I selected the K3S for a number of reasons including the great reputation of the K3, the support that Elecraft provides its customers, and because I wanted to buy American. I will be referring back to the TS990S during this review for comparison purposes which I hope will be interesting to most folks.
First a little info on my station setup:
Radio: K3S equipped with: 100W upgrade, ATU, TCXO 0.5ppm, FM/2.8/400Hz/250Hz 8 pole filters Gen Coverage RX, Digital Voice Recorder, Ext 10MHz ref input, 2nd Receiver with 2.8 8 pole filter
Antennas: Traffie 5 band Hexbeam at 35ft, ground mounted Steppir BigIR vertical with 42 radials - used primarily on 40m & 6m .
Amplifier: Expert 1.3K-FA solid state linear amplifier (I also reviewed this here on eHam)
Panadapter: QSR1 SDR connected to the K3S's RX-OUT via a Stridberg MCA102M multicoupler and a DX Engineering Receiver Guard 5000. I also got the P3 that I am running alongside the QSR1. I will review this separately.
You can read more about my setup at http://w9tvx.com
I should also add that I am operate primarily Voice and Data modes specifically: PSK, JT65, RTTY, Olivia. I am NOT a CW operator.
I think I can summarise my review with one word: Surprise. I was surprised on a number of fronts with the K3S - but to be fair, I only have a couple weeks operation under my belt.
Coming from the Kenwood with its dual screens and extensive physical front panel, I was seriously concerned that the K3S would be an ergonomic nightmare. After all, many of its buttons and knobs serve two, and sometimes three purposes. The radio is also significantly smaller than the TS990S leading to concern that it would be extremely fiddly. Also, instead of a nice large colour touchscreen and a secondary display, the K3S has a small monochrome display. To be sure, for the first couple of hours as I sat in front of the radio reading through the manual, while playing with the various features, I wondered if I had made a horrible mistake. Then a funny thing happened: Things just started to make sense. There is a wonderful cohesiveness to the radio, and in the short time that I have had it, I have had many moments when I have thought to myself: "wow that's cool" or "that's well thought out"
Let me provide a couple of examples:
I wanted to set up my microphone with the radio. As part of the setup I would like to set the mic gain and compression, as well as the transmit equaliser. When doing this, I don't want to actually transmit. In most cases what you'd do is attach a dummy load to one of the antenna ports and test away. With the K3S, there is a really convenient test mode. Put the radio into this mode by a simple button press and the radio behaves exactly as if you are transmitting. There is even an intutive indicator to let you know that you are in test mode.
Another example is that normally you have to use the band buttons to cycle through the different bands. So if you are on 12m and want to get to 40m, you have to cycle through several bands to get to it - Yes you can set up memory locations, but they take you to a specific location on the band, and I may just want to return to the prior location at which I was. On the TS990, there are dedicated band buttons for each of the bands, so you can directly punch in the band to which you want to go. The radio has a ton of front panel real estate, so there is plenty of room for this. However, with the K3S there is a way to get this functionality by setting the 0-9 memory config option to band select. With this mode enabled, you can directly decide which of the keypad buttons selected which band. For example, I have keypad 1 at 40m, 2 at 30m, 3 at 20m etc. To get to the last frequency at which I was tuned on a given band, I need only press the M>V button and the corresponding keypad button. Is it as direct as on the TS990S? No, but it is effectively as good and really no slower. One other nice feature on band selection is that if you do like cycling through the bands using the band buttons, you can configure the bands that you want to include. So far example, if you don't work 160m or 6m, you can simply elect for them to be disabled. My point is that the K3S allows you to configure it to fit your operating style.
One of the nice features of the TS990S is its menu system. It is really easy to navigate and configure because of the nice large screen tha can display lots of descriptive text about each menu item. In addition, you can see a large chunk of the menu tree. One of the criticisms of the K3S is that the menu system is complicated and hard to use. As a caveat, I will confess that I am a computer geek, so menu systems and settings don't intimidate me. I recall reading many a post on the various forums that would claim that most of the K3 menu items are set and forget, and to be honest I was a tad bit skeptical. After all, K3 owners are known to be a little zealous about defending their radios. Having worked through the K3S menu system I will say that while there is no question that it is easier to navigate and set menu elements on the 990S; it is actually true that in many cases on the K3S, menu items are set and forget. Furthermore, if you take the time to read the manual and spend time with the radio, you will discover that things are for the most part laid out logically. There is even help for each menu element by pressing the DISP key while viewing the menu item. This is fine in a pinch or for a reminder, but is no substitute for referencing the manual.
Another nice feature of the KS3 is that is supports both a USB and an RS232 port for CAT data via the KIO3B module. Previously the K3 only supported an RS232 port, and you'd have to use a device like Signalink for digital modes. By using the USB port to connect to a computer, you also get a built-in sound device mitigating the need for a third party solution. This was one of the features that I loved about the TS990S, and was a key factor that pushed me to move on the Elecraft.
There is however an issue that I have with the new dual port solution, and that is that you really don't get two ports. on the TS990 (and 590 for that matter), you get both an RS232 and a USB port that can operate separately. On the K3S, only one of the ports can be active for CAT TX and RX data (I should note that you can still connect a computer to the USB port and a P3 panadapter to the RS232 port.) The reason for this I was told is that the K3 MCU only has one serial i/o channel to the KIO3B module. The reason this was an issue for me is that on my Kenwood I would use the USB port to connect to my PC, and the RS232 port to connect to my Expert 1.3K-FA amplifier. The amplifier would use the connection to poll the radio for frequency data that it uses to continually look up the best values for the antenna tuner allowing for automated operation. In the words of Homer Simpson, this was a "Doh" moment for me.
As I stated earlier, Elecraft's reputation for customer service and support was one of the deciding factors in my purchasing this radio, so I decided to put it to the test. I looked up the email address of one of the cofounders (Wayne Burdick) and shot him an email with my issue. Within a couple of hours, I received a response from Wayne being honest about the issue and telling me he would have someone from engineering reach out to me to see if we could find a workaround. About an hour later I was in an email dialog with an Elecraft engineer. He advised me that while there could only be one TX channel, RX data (e.g. frequency data) was transmitted to both ports. We had a few more email exchanged and came up with a solution which I tried out and which worked such that the amp was happily following the radio's VFO.
All I can say is that without question Elecraft absolutely deserves its reputation as a customer focused company. No way could I expect this kind of response from one of the big three.
I would like to spend a little time talking about operating the radio on different modes. I should take a few sentences to describe my operating setup.
My primary software platform is HRD 6.2. I have a virtual com port pair that I use for connecting N1MM+ to HRD when contesting. I also have HDSDR talking to HRD via a DDE linke (built into HDSDR) which gives me an excellent panadapter capability via a QSR1 SDR (connected to the K3S via RX-IN/RX-OUT as described earlier). So I am able to click to signals in HDSDR waterfall, and HRD will set the radio to the appropriate frequency. I also have a P3+SVGA, because I'm into overkill. For digital operations, I use DM780 for PSK/Olivia/RTTY and WSJT-X/JTALERT-X for JT65/JT9 digital modes. I am not a CW operator which I know and admit is shameful.
Much has been made about the harshness of the K3 audio. Again this was an area of significant concern for me when purchasing the radio. To be fair, this is one of those areas which is highly personal, and what may be acceptable or even pleasing to my ears may be grating to another’. In my case, I found it imperative to spend some time tweaking the RX equaliser for the different speakers that I use with the radio. Having done that, I feel that the audio is not at all fatiguing to listen to.
In operating the radio in phone, I discovered that I spend the majority of my time using the passband filter knobs to tune out adjacent stations with an exponentially smaller amount of time spent using the notch filter, NR, and NB facilities (As an aside, I do find that I miss the TS990s Band Elimination Filter in some cases). I found the K3S to integrate very well into my software platform, as well it was very easy to operate. There were some features that I missed from my TS990, such as the ability to visually see the notch filter location in the passband, the actually passband LO/HI cutoff values at all times etc.
One thing that I do not like about the K3S is the VFO-A knob. When I compare this to the Kenwood knobs, it feels awful. In particular, the way the tuning resistance is provided by using felt pads feels... well like two felt pads rubbing together. I know that this is probably lightweight and the radio is used on DXExpeditions; however, there must be a better way solution
As far as digital modes go, the only mode that I have worked so far is JT65. Putting the K3S into the appropriate data mode involves pressing the mode button until the radio is in DATA mode, and then long pressing the AFX button to enter a data submode at which point you can rotate the VFO-B dial to pick the desired data mode. The K3S provides a number of options for digital communications including onboard decoding of CW/RTTY/PSK signals. In my opinion the USB port on the KIO3B really shines here, because you get a built-in soundcard, so no need to have any external devices like a Signalink. The K3S is also smart about its settings when in data mode. For example, when in DATA A, compression is disabled, mic gain switched to line in, and the TX equaliser is set to flat. This last feature made me jump for joy, because a pet peeve of mine with the TS990 is that it would not set the TX equaliser to be flat in data modes, and I would always have to remember to switch it off. Invariably I wouldn't until I saw the signal display on first transmit.
There are a couple of features that immediately come to mind and that I'd like to see after my couple weeks of operation:
The ability to to save and recall multiple audio profiles. By audio profile I mean RX & TX equaliser settings as well as microphone gain and compression settings. I switch between a Kenwood MC-90/Klipsch speakers and a Heil Proset depending on if I am ragchewing or contesting. Each of these setups requires a different audio profile. Currently I have to manually go in and setup each element of the profile each time I switch. One idea would be to add a menu option to save/recall audio profiles. Then long pressing a keypad digit would save the current profile, and tapping it would recall it. Bonus points for being able to name the profile on saving. Also bonus points for being able to assign the menu item to a PF key such that tapping the PF key will cycle through the saved profiles. Now having written all this, I'm sure someone will tell me that this is already possible!
The ability to quickly recall current settings. By this I mean: The current passband, the location of the notch filter, mic gain and compression settings. Personally, I would like it if a second tap of the DISP button would provide the ability to see this kind of data.
View the notch filter on the P3 display. One of the nice features of the TS990S is the ability to visually see the where the notch filter is located on the passband. This is really handly as you can visually tune it to the location of the interference. If this could be displayed on the P3 it would be wonderful. The scenario would be that you'd set the SPAN to a small value such that you could clearly see the location of the interference, and then tune the notch filter to suppress it. Not sure even if this is possible, given the hardware architecture, but it would sure be nice. While we are about it, the P3 already displays the passband and changes to it in realtime. Why not have it also display the passband low/hi/shift/width values - if only when they are being changed?
Ability to be able to lock the Compression+Mic and Power settings separately. The rationale for this is that once I have my gain and compression set for a given operating mode, I am unlikely to change it while I am far more likely to change power. It is quite easy to accidentally reach for the MIC knob when intending to turn the PWR knob in the heat of battle - at least for this operator - which can be quite annoying.
In summary, in the short time in which I have owned this radio, I am very pleased it. Overall the K3S is a worthy upgrade to the K3, and the best part is that K3 owners can, overtime, upgrade their radios with whichever capabilities of the K3S that they desire. Having said this, the K3S is not a cheap radio. My setup cost almost six thousand dollars and, to be honest, when you take the radio out the box and look at it, you think to yourself: "This sure doesn't look like six grand worth of radio". It is in no way as impressive looking or feeling as a TS990: The buttons are rubber, the VFO knob has a crummy tactile feedback, and the screen is small and monochromatic. But turn it on and operate it, and you realise that this is a very special radio that does all the important things very very well. In this operators humble opinion thus far it is worth every penny that was paid for it.
I will definitely write a follow-up review after a number of months of usage to see if the blush has worn off.
K3S 1 Year Update
This review first appeared on eHam.net
I have owned an Elecraft K3S for just over an year and this ‘update review’ is a follow on review to my initial impressions review of the K3S (which I believe was the first review of the K3S on eHam)
While I continue to give this radio a 5/5 rating in this review, as I mentioned in my first review, I think eHam's rating system is not granular enough. Nothing is perfect, and I would given the radio a rating of 4.8/5.0 if I were able to do so.
As usual I’ll first provide a little info on my station setup:
Radio: K3S equipped with: 100W upgrade, ATU, TCXO 0.5ppm, FM/2.8/400Hz/250Hz 8 pole filters Gen Coverage RX, Digital Voice Recorder, Ext 10MHz ref input, 2nd Receiver with 2.8 8 pole filter. In addition, I have two Elecraft SP3 speakers with which I am particularly happy. Recently I added a Elecraft K-Pod to my operating setup. The jury is still out on this accessory.
Antennas: Traffie 5 band Hexbeam at 35ft, ground mounted Steppir BigIR vertical with 42 radials - used primarily on 40m & 6m .
Amplifier: Expert 1.3K-FA solid state linear amplifier (I also reviewed this here on eHam)
Panadapter: QS1R SDR connected to the K3S's RX-OUT via a Stridberg MCA102M multicoupler and a DX Engineering Receiver Guard 5000. I also have a Telepost LP Pan 2, but I find the QS1R to be a much more useable setup. I did iniitally purchase a P3 with the K3S, but have since sold it and returned to exclusively using the QS1R. (I will shortly posted a P3 review on eHam along with the reasons on why I sold it)
Software: I started by using HRD 6.3 with the K3S, then moved to a combination of Win4KSuite, Log4OM, and DM780. Ulitmately, I ended up moving back to HRD 6.3 since it seems to involve the fewest moving parts and interfaces in my station setup. For contesting I use N1MM+, and for JT9/65 I use WSJT-X and JTAlert.
You can read more about my setup at http://w9tvx.com
Over the past year I have continued operating primarily Voice and Data modes specifically: PSK, JT9/65, RTTY, and Olivia. I am NOT a CW operator - yes I know: ‘shame on me’. I have entered several contests including the CQ WW WPX and CQ WW DX contests, and have been very satisfied with the K3S’ performance in quite rigourous contesting environments. In addition, interfacing the K3S with digital software such as WSJT-X, fldigi, and DM780 for digital modes is trivial thanks to the USB port and built-in sound card provided by the KIO3B board which comes standard with the radio. This past year my operating mix has been about 60% digital and 40% Phone, mostly due to band conditions at my QTH. Typically I operate 60% Phone and about 40% digital.
I currently use both a Kenwood MC-90 microphone and a Heil Proset with my radio. I have spent time tuning the mic gain, compression, and TX Equalizer settings for each microphone and am happy to report that I get consistenly good audio report. In particular, the MC-90 seems to solicit the most complements.
One of the common complaints about the K3(S) is that received audio can be harsh. I have not had this experience with my radio either with the SP3 speakers nor my Heil headset. Again, I spent the time tuning the radio for each setup. I completely understand that perceived audio quality is extremely personal and what is pleasing to one may be grating to another. With this in mind you mileage may vary
Prior to the K3S I owned a Kenwood TS990S. When I first moved to the Elecraft from the Kenwood, I was very concerned about losing the large display and plethora of front panel knobs on the Kenwood to the spartan display and much smaller front panel of the K3S. As I mentioned in my first review, I was initially dismayed at the loss of direct access to most of the radios functionality; however, I rather quickly realised that the K3S was actually quite intuitive and that many, if not most, of the functions were set and forget, with all the most important functions in fact being directly accessible from the front panel of the radio.
I’m happy to report that this has remained true over the past year. Operating the radio continues to be both intuitive and very easy. To be fair, much of this is certainly due to my increased familiarity with the radio, but it is equally true to say that the logical and well thought out radio layout and software on the K3S has significantly help contribute to this familiarity.
While I do use a computer interface (HRD 6.3) to the radio, for the most part I tend to use the front panel buttons while operating the radio. Primarily, I use the VFO-A knob, TUNE button, NTCH button, passband knobs, and AF pot on a daily basis. Less frequenlty, I use the split operations buttons and VFO-B knob. I rarely if ever have to deep dive into the menus since I initially setup the radio. HRD 6.3 allows me to see the state of the radio at a glance (mostly the current power setting), and more importantly allows me to define software macro’s for setting such things as microphone grain, compression, and EQ settings at the press of a button. This is highly useful when switching between my MC-90 microphone and Heil Proset headset which require different setting for the aforementioned parameters
Of course nothing is perfect, and I wish that there certain features provided on the radio (some of which I discussin my first review and will repeat below.)
- In order to determine the current power output of the radio. One has to either rotate the PWR pot or view it on a third party radio control software. I would argue that the radio’s current power output is a primary piece of information and there are at least a couple of places where Elecraft could make this information available: The first is that there seems to be room to the right of the main VFO frequency display to display the current power setting. Should this not be possible another option would be to make is available as one of the items in the dispay rotation (currently the user can by tapping the DISP button either display the freqency of VFO-B - in which case the VFO-B knobwill change the VFO-B frequency - or with another tap a host of other information such as time, date, voltages, etc. This information may be cycled through usingthe VFO-B knob). Regardless, I’m sure Elecraft could find a way to more readily present this information
- The ability to to save and recall multiple audio profiles. By audio profile I mean RX & TX equaliser settings as well as microphone gain and compression settings. I switch between Kenwood MC-90/Elecraft SP3 speakers and a Heil Proset depending on if I am ragchewing or contesting. Each of these setups requires a different audio profile. Currently if I wish to use the radio’s front panel, I have to manually go in and setup each element of the profile each time I switch. One idea would be to add a menu option to save/recall audio profiles. Then long pressing a keypad digit would save the current profile, and tapping it would recall it. Bonus points for being able to name the profile on saving. Also bonus points for being able to assign the menu item to a PF key such that tapping the PF key will cycle through the saved profiles.
- The ability to quickly recall current settings. By this I mean: The current passband, the location of the notch filter, mic gain and compression settings. Personally, I would like it if a second tap of the DISP button would provide the ability to see this kind of data. Even adding them to the DISP information loop - as I mention for power above - would be useful
- Ability to be able to lock the Compression+Mic and Power settings separately. Today it is possible to lock all three, but in reality once I have my gain and compression set for a given operating mode, I am unlikely to change it while I am far more likely to change power e.g. when placing or removing a linear amplier in the transmit loop. Currently, It is quite easy to in the heat of battle accidently reach for the MIC knob when intending to turn the PWR knob - at least for this operator - which can be quite annoying.
The good news is that I think the above could all for the most part be implemented in firmware, and I eagerly and with baited breath await their implementation - I certainly hope I don’t turn blue and passout
In my first review, I did complain quite a vocally about the VFO-A knob. To quote:
‘One thing that I do not like about the K3S is the VFO-A knob. When I compare this to the Kenwood knobs, it feels awful. In particular, the way the tuning resistance is provided by using felt pads feels... well like two felt pads rubbing together. I know that this is probably lightweight and the radio is used on DXExpeditions; however, there must be a better way solution’.
Since that review, the knob seems to have ‘broken in’ somewhat, and while it is by no means great, it is better than it was when I first received the radio. I still feel that there is room for improvement and will say that many of the Japanese radios costing far less that the K3S do a better job.
In summary, after having owned this radio for over a year, I continue to be very pleased its performance and usability. The K3S is not a cheap radio, easily approaching six thousand dollars when purchased with the bells and whistles. Sitting in the shack it in no way has the commanding look or feel of the flagship radios from the big three Japanese vendors. However, this is without doubt a case of ‘Dont judge a book by its cover’. For each time I operate the K3S, I continue to realise that it is a very special radio that does all the important things extremely well. Finally, I usually become bored with a radio after about a year, and find excuses to start looking for the ‘next best thing’ with which to replace it. Quite honestly, this is the first time I have remained delighted with a radio and continue to look forward to using it on a daily basis. This, in this operators humble opinion, makes it worth every penny for which I paid for it.
SPE 1.3K-FA
This review first appeared on eHam.net
This is an preliminary review of the SPE Expert 1.3K-FA linear amplifier. I have owned this amplifier for about two weeks. Thanks to its built-in tuner, this amplifier replaces both a Tokyo Hy-Power HL-1.5KFX 1kW solid state amplifier, as well as a Palstar HF-AUTO high power antenna tuner.
Before diving into the 1.3K-FA, here is a brief overview of my operating conditions:
- Radio: Kenwood TS990S with a QSR1 SDR acting as a panadapter
- Antennas: Traffie HXi 5 Band Hex-Beam rotated with a Yaesu G450A used on 10m - 20m and a Steppir BigIR vertical used primarily on 6m and 40m.
- Primarily operate SSB Phone and digital modes including RTTY, PSK31, JT65, and OLIVIA. I am not a CW operator.
You can find out more about my station at http://w9tvx.com
Why The Expert 1.3K-FA?
======================
There were several factors that motivated me to considering parting with my Tokyo Hy-Power/Palstar combination and opting for the SPE amplifier:
Due to its (optionally) integrated antenna tuner, the Expert amp would replace two pieces of equipment with one resulting in a reduced footprint.
The SPE amplifier is much smaller and lighter than the THP amp alone, and provides 500W more output.
It is less sensitive to SWR than the THP amplifier
It includes USB connectivity and a software package that allows for computer control of the amplifier
Firmware upgradeable via the USB port
Provides a port that allows for control of a tunable antenna such as a Steppir
Can operate on 6m
Quiet operation when compared to the THP
While I was reasonably happy with the THP Palstar combination, there were a couple of issues:
The THP amplifier is very sensitive to SWR. If it even thinks it’s going to sniff an SWR higher than 1.5 it will trip it’s safety circuits. Not a bad thing for protecting one’s investment, but it certainly would have been nice if it were a little more forgiving of higher SWR
THP is unfortunately no longer in business.
Despite being a fine piece of hardware, the Palstar HF-AUTO tuner can have a tendency to have to hunt for a match. I was never convinced that it stored an effective lookup table - Perhaps it was just operator error, but that was my experience .
The net effect of the above is that when changing frequency (not band as the THP followed the transceiver’s band via a CAT connection), I would have to switch the amp out of operating mode, tune to the frequency to an SWR of under 1.5. If I failed to do this and the SWR even thought about going above 1.5, the THP safety circuits would trip. I would invariably forget one of the aforementioned steps in the heat of battle.
Ordering and Shipping
==================
I pre-ordered my 1.3K-FA from Expert Amps USA, and from day one I was provided with fantastic customer service. The good folks at Expert USA kept me in the loop every step of the way from letting me know when the amplifier was approved by the FCC, to when it arrived from Italy, and finally to when they completed in-house testing and shipping out to my residence. Well done and kudos indeed!
The amplifier arrived at my front door step in a non-descript brown box. Opening the box I discovered a brown soft sided transport carry bag with SPE logo and the amplifier name stamped on the side firmly ensconced in padding material. Inside the carry case was the amplifier along with:
- Two cables with RCA (phono) connectors for ALC, RELAY links.
- One USB standard cable.
- Three connectors DB-15, 1 connector DB-9 for build one’s own cables
- CD-ROM containing the user manual and the software for remoting.
- One 20 A spare fuse.
- Spare air filter.
- Certificate of compliance and warranty form.
Connecting The Amplifier
=====================
Connecting the amplifier to my setup was a trivial task. The first thing I had to do was cut off the supplied “euro power connector” and wire up a 220/240v plug. I should note that the amplifier will run off of 110v, but I recall reading that it can operate at a reduced output; however don’t quote me on that.
Next I hooked up the ALC and Relay links. Fortunately I already had a cable for pain in the rear kenwood accessory port DIN connector. I should note that SPE strongly recommends connecting the ALC lead from the transceiver to the amplifier. Next step was hooking up a cable that I had purchased from Array y Solution between the TS990S’ DB9 port and one of the CAT ports on the amplifier. Finally I connected my two antennas to two of the antenna ports.
A quick word about the Array Solutions Cable: It didn’t work. I had been shipped a Kenwood CAT 1 cable that had been modified to be a CAT 2 cable; however further inspection showed that the folks at Array Solutions hadn’t bothered connecting the CTS and RTS pins as required. Shoddy and disappointing.
Now would be a good time to talk the connectivity options supported by the 1.3K-FA. The amplifier can handle up to four antennas. It can automatically switch antennas based on operating frequency. Furthermore, it can directly control a “tunable antenna” such as SteppIR antenna via a port on the back of the amplifier
The 1.3K-FX will support SO2R operations by supplying a second CAT port, ALC/RELAY connectors, and an input for a second radio. There is also an antenna port available for connecting to a multiband antenna for receive operations. I have not had a need for operating in this mode, so I will leave further description to other who have had experience
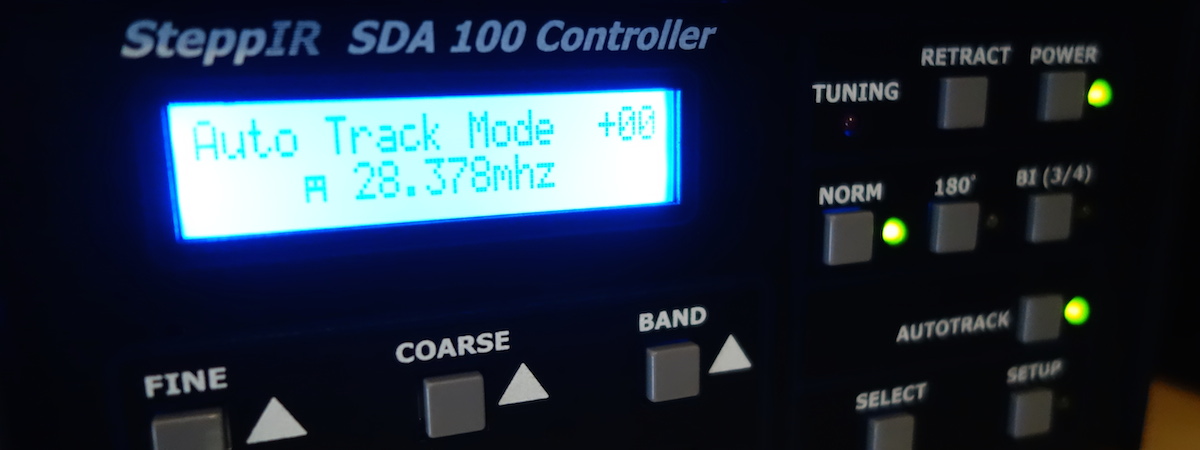
Next I tried to connect my Steppir SDA100 antennal controller to the amplifier’s PORT connector. I checked and double checked the cabling, but I could never could get it work. I’m almost certain that this was “operator error”, and I simply connected the the SDA100 to the tranceiver’s DB9 port by using a Y splitter cable. In hindsight, this was actually a better solution since it seems that when you designate an antenna as a “tunable antenna” in the 1.3K-FA configuration, it won’t engage the antenna tuner - at least I couldn’t get it to do so. I think this is because, the amplifier software assumes that a tunable antenna can be tuned to an SWR of less than 1.5. I don’t think this is a good assumption, and due to its location is certainly not the case with my Steppir BigIR across all bands.
Initial Setup
==========
Initial setup of the amplifier is quite straightforward.
Pressing the “set” button on the front panel puts the amplifier in “configuration mode”. From here you can setup the Antenna, CAT, Tunable Antenna and various other configurations, as well as view the alarm log, and enter a manual tuning mode.
The Antenna configuration allows for two “banks” (or configurations). Each configuration allows the user to pick up to two antenna’s for each band: 160m - 4m. For each antenna, you pick antenna 1-4 or NO if there is antenna for the band. Pressing the tune button with bypass the tuner for that antenna on that band. Note that if you have specified an antenna to be a tunable antenna, the letter “t” appears after the antenna number and the tuner is bypassed by default and cannot be engaged (again, I couldn’t find a way around it).
The CAT configuration option allows you to pick the vendor protocol for each of the two CAT inputs. Included are: Icom, Kenwood, Yaesu, Ten-Tec, FLEX, and Elecraft. You can also select None.
The tunable antenna option allows you to set any of the four antennas as tunable antennas as well as configure the PORT for controlling the antenna(s)
Finally, and quite importantly, if you have the antenna tuner installed, it is necessary to match the antennas to the amplifier. This is done consulting a table that contains sub-band frequencies for each of the bands. For each antenna for a particular band, you look up each of the sub-band frequencies for each band and tune the radio to that frequencies. You then press the tune button on the front of the amplifier and transmit a continuous tone (e.g. CW). This will cause the tuner to match on the frequency and store it in a lookup table. In this way you amplifier can lookup the correct match based on the frequency to the which the radio is tuned (via the CAT connector) and “guarantee” a low SWR for that frequency. I found this to work quite well, though I still check the SWR before going from standby to operate mode.
In my experience, all the programming steps above took about 20-30 minutes to achieve.
Operation
========
Operating this amplifier is a breeze. Assuming, you have successfully completed the programming steps, all you have to do is select the output level (low, medium, or high), press the operate button to go from standby to operating mode, and begin transmitting. It really is that easy!
SPE does provide instructions on setting drive levels for various operating modes in their manual, and for the most part it is straightforward. Basically for SSB you want to adjust mic gain so that signal peaks are below rated maximum power. With CW, keydown gives maximum power for the setting (low, medium, high) automatically. RTTY and other Digital modes are recommended to be used with the low or medium power output settings. For AM SPE also recommends using the low or medium output settings
So far, I have had a very good experience with this amplifier. I have had no trouble contacting DX stations in trying conditions, and my signal and audio reports have all been very satisfactory.
Protection
=========
The amplifier has a number of protection systems, should things go awry, and you can access all alarms in the alarm log option of the settings screen. The protections systems are implemented both in hardware and software. There are three levels of alarm:
- Simple which basically just provides an audible alert and self corrects without operator intervention
- Serious which causes the amplifier to switch back to standby mode. For example due to exceeding safe operating temperature parameters
- Fatal which can be caused by a CPU failing or a fault in the power supply module. This causes the amplifier to shut down.
Computer Software
================
SPE provides a software package called KTerm, that provides remoting capability from a PC. There are two versions provided: One that works with a USB port, and the other that works with an RS232 port. I installed the USB version as I had connected 1.3K-FA to my PC via a USB cable.
The software basically provides a mirror image of the front panel keys and display on the PC. The software is very functional, but in my opinion falls far short of what could be possible. At the very least, it would be nice if there were an option to keep the software’s window(s) on top of other windows on the desktop
Conclusion
=========
While at over $5,000 US, this is not a cheap amplifier, the feature set, weight, and size make it a fantastic addition to either a home station or a DX expedition. In my short time with this product, I have exceedingly happy with it’s functionality and performance
This is an preliminary review of the SPE Expert 1.3K-FA linear amplifier. I have owned this amplifier for about two weeks. Thanks to its built-in tuner, this amplifier replaces both a Tokyo Hy-Power HL-1.5KFX 1kW solid state amplifier, as well as a Palstar HF-AUTO high power antenna tuner.
Before diving into the 1.3K-FA, here is a brief overview of my operating conditions:
- Radio: Kenwood TS990S with a QSR1 SDR acting as a panadapter
- Antennas: Traffie HXi 5 Band Hex-Beam rotated with a Yaesu G450A used on 10m - 20m and a Steppir BigIR vertical used primarily on 6m and 40m.
- Primarily operate SSB Phone and digital modes including RTTY, PSK31, JT65, and OLIVIA. I am not a CW operator.
You can find out more about my station at http://w9tvx.com
Why The Expert 1.3K-FA?
======================
There were several factors that motivated me to considering parting with my Tokyo Hy-Power/Palstar combination and opting for the SPE amplifier:
Due to its (optionally) integrated antenna tuner, the Expert amp would replace two pieces of equipment with one resulting in a reduced footprint.
The SPE amplifier is much smaller and lighter than the THP amp alone, and provides 500W more output.
It is less sensitive to SWR than the THP amplifier
It includes USB connectivity and a software package that allows for computer control of the amplifier
Firmware upgradeable via the USB port
Provides a port that allows for control of a tunable antenna such as a Steppir
Can operate on 6m
Quiet operation when compared to the THP
While I was reasonably happy with the THP Palstar combination, there were a couple of issues:
The THP amplifier is very sensitive to SWR. If it even thinks it’s going to sniff an SWR higher than 1.5 it will trip it’s safety circuits. Not a bad thing for protecting one’s investment, but it certainly would have been nice if it were a little more forgiving of higher SWR
THP is unfortunately no longer in business.
Despite being a fine piece of hardware, the Palstar HF-AUTO tuner can have a tendency to have to hunt for a match. I was never convinced that it stored an effective lookup table - Perhaps it was just operator error, but that was my experience .
The net effect of the above is that when changing frequency (not band as the THP followed the transceiver’s band via a CAT connection), I would have to switch the amp out of operating mode, tune to the frequency to an SWR of under 1.5. If I failed to do this and the SWR even thought about going above 1.5, the THP safety circuits would trip. I would invariably forget one of the aforementioned steps in the heat of battle.
Ordering and Shipping
==================
I pre-ordered my 1.3K-FA from Expert Amps USA, and from day one I was provided with fantastic customer service. The good folks at Expert USA kept me in the loop every step of the way from letting me know when the amplifier was approved by the FCC, to when it arrived from Italy, and finally to when they completed in-house testing and shipping out to my residence. Well done and kudos indeed!
The amplifier arrived at my front door step in a non-descript brown box. Opening the box I discovered a brown soft sided transport carry bag with SPE logo and the amplifier name stamped on the side firmly ensconced in padding material. Inside the carry case was the amplifier along with:
- Two cables with RCA (phono) connectors for ALC, RELAY links.
- One USB standard cable.
- Three connectors DB-15, 1 connector DB-9 for build one’s own cables
- CD-ROM containing the user manual and the software for remoting.
- One 20 A spare fuse.
- Spare air filter.
- Certificate of compliance and warranty form.
Connecting The Amplifier
=====================
Connecting the amplifier to my setup was a trivial task. The first thing I had to do was cut off the supplied “euro power connector” and wire up a 220/240v plug. I should note that the amplifier will run off of 110v, but I recall reading that it can operate at a reduced output; however don’t quote me on that.
Next I hooked up the ALC and Relay links. Fortunately I already had a cable for pain in the rear kenwood accessory port DIN connector. I should note that SPE strongly recommends connecting the ALC lead from the transceiver to the amplifier. Next step was hooking up a cable that I had purchased from Array y Solution between the TS990S’ DB9 port and one of the CAT ports on the amplifier. Finally I connected my two antennas to two of the antenna ports.
A quick word about the Array Solutions Cable: It didn’t work. I had been shipped a Kenwood CAT 1 cable that had been modified to be a CAT 2 cable; however further inspection showed that the folks at Array Solutions hadn’t bothered connecting the CTS and RTS pins as required. Shoddy and disappointing.
Now would be a good time to talk the connectivity options supported by the 1.3K-FA. The amplifier can handle up to four antennas. It can automatically switch antennas based on operating frequency. Furthermore, it can directly control a “tunable antenna” such as SteppIR antenna via a port on the back of the amplifier
The 1.3K-FX will support SO2R operations by supplying a second CAT port, ALC/RELAY connectors, and an input for a second radio. There is also an antenna port available for connecting to a multiband antenna for receive operations. I have not had a need for operating in this mode, so I will leave further description to other who have had experience
Next I tried to connect my Steppir SDA100 antennal controller to the amplifier’s PORT connector. I checked and double checked the cabling, but I could never could get it work. I’m almost certain that this was “operator error”, and I simply connected the the SDA100 to the tranceiver’s DB9 port by using a Y splitter cable. In hindsight, this was actually a better solution since it seems that when you designate an antenna as a “tunable antenna” in the 1.3K-FA configuration, it won’t engage the antenna tuner - at least I couldn’t get it to do so. I think this is because, the amplifier software assumes that a tunable antenna can be tuned to an SWR of less than 1.5. I don’t think this is a good assumption, and due to its location is certainly not the case with my Steppir BigIR across all bands.
Initial Setup
==========
Initial setup of the amplifier is quite straightforward.
Pressing the “set” button on the front panel puts the amplifier in “configuration mode”. From here you can setup the Antenna, CAT, Tunable Antenna and various other configurations, as well as view the alarm log, and enter a manual tuning mode.
The Antenna configuration allows for two “banks” (or configurations). Each configuration allows the user to pick up to two antenna’s for each band: 160m - 4m. For each antenna, you pick antenna 1-4 or NO if there is antenna for the band. Pressing the tune button with bypass the tuner for that antenna on that band. Note that if you have specified an antenna to be a tunable antenna, the letter “t” appears after the antenna number and the tuner is bypassed by default and cannot be engaged (again, I couldn’t find a way around it).
The CAT configuration option allows you to pick the vendor protocol for each of the two CAT inputs. Included are: Icom, Kenwood, Yaesu, Ten-Tec, FLEX, and Elecraft. You can also select None.
The tunable antenna option allows you to set any of the four antennas as tunable antennas as well as configure the PORT for controlling the antenna(s)
Finally, and quite importantly, if you have the antenna tuner installed, it is necessary to match the antennas to the amplifier. This is done consulting a table that contains sub-band frequencies for each of the bands. For each antenna for a particular band, you look up each of the sub-band frequencies for each band and tune the radio to that frequencies. You then press the tune button on the front of the amplifier and transmit a continuous tone (e.g. CW). This will cause the tuner to match on the frequency and store it in a lookup table. In this way you amplifier can lookup the correct match based on the frequency to the which the radio is tuned (via the CAT connector) and “guarantee” a low SWR for that frequency. I found this to work quite well, though I still check the SWR before going from standby to operate mode.
In my experience, all the programming steps above took about 20-30 minutes to achieve.
Operation
========
Operating this amplifier is a breeze. Assuming, you have successfully completed the programming steps, all you have to do is select the output level (low, medium, or high), press the operate button to go from standby to operating mode, and begin transmitting. It really is that easy!
SPE does provide instructions on setting drive levels for various operating modes in their manual, and for the most part it is straightforward. Basically for SSB you want to adjust mic gain so that signal peaks are below rated maximum power. With CW, keydown gives maximum power for the setting (low, medium, high) automatically. RTTY and other Digital modes are recommended to be used with the low or medium power output settings. For AM SPE also recommends using the low or medium output settings
So far, I have had a very good experience with this amplifier. I have had no trouble contacting DX stations in trying conditions, and my signal and audio reports have all been very satisfactory.
Protection
=========
The amplifier has a number of protection systems, should things go awry, and you can access all alarms in the alarm log option of the settings screen. The protections systems are implemented both in hardware and software. There are three levels of alarm:
- Simple which basically just provides an audible alert and self corrects without operator intervention
- Serious which causes the amplifier to switch back to standby mode. For example due to exceeding safe operating temperature parameters
- Fatal which can be caused by a CPU failing or a fault in the power supply module. This causes the amplifier to shut down.
Computer Software
================
SPE provides a software package called KTerm, that provides remoting capability from a PC. There are two versions provided: One that works with a USB port, and the other that works with an RS232 port. I installed the USB version as I had connected 1.3K-FA to my PC via a USB cable.
The software basically provides a mirror image of the front panel keys and display on the PC. The software is very functional, but in my opinion falls far short of what could be possible. At the very least, it would be nice if there were an option to keep the software’s window(s) on top of other windows on the desktop
Conclusion
=========
While at over $5,000 US, this is not a cheap amplifier, the feature set, weight, and size make it a fantastic addition to either a home station or a DX expedition. In my short time with this product, I have exceedingly happy with it’s functionality and performance
Traffie Hexbeam
This review first appeared on eHam.net
I have had the Traffie Hex-beam up for a couple of weeks, and I can't overstate how delighted I am with this antenna. I had considered a broadband hex-beam ala a K4KIO; however, I simply didn't have enough room for the additional wingspan of the antenna.
The Traffie antenna is by no means cheap; however, it is exceedingly well engineered and a joy to assemble. All the parts are very high quality, and the design is well thought out and is quality through and through. If you want a top notch antenna, then this is the one, and in my humble opinion it is worth the asking price
Assembly took about 3 hours. It does require a set of helping hands mostly to help attach the elements to the spreaders. The instructions are very precise and easy to follow and everything just fits together. The end result is a very balanced and, dare I say, visually pleasing antenna.
Prior to the hex beam, I was using a Steppir BigIR vertical antenna. To be fair, due to lot limitations, the antenna is not mounted in the ideal location, and the ground radials (42 of them) had to be routed in creative ways around the property. Having said that, I have had some great success with this antenna (and I will continue to use it as a backup, as well as on 40 & 6 meters).
The hex-beam, has taken things to another level. To be fair, it is mounted in a much more ideal location than the BigIR (I have mine mounted up at 35ft on a 4.5ft Glen Martin roof mounted tower. It is being rotated by a Yaesu G450A rotator.) Despite this fact, there is no doubt that having a beam antenna makes all the difference in the world. I am able to both hear and communicate with stations that I have not been able to hear in the past. Whereas I would have to work much harder to get through a pileup or "reel in" a station, things are just so much easier with the hex-beam. I have switched back and forth between the Steppir and the Traffie and difference is jaw dropping.
In summary, this is an amazingly well built antenna that provides a directional antenna in an exceedingly small footprint.
TS990S
This review first appeared on eHam.net
This is my one year ownership review of the Kenwood TS-990S. I go into the features that I find to be most useful to me personally, but this is by no means a comprehensive list. As it is, this review grew much larger than I intended!
SUMMARY
I operate primarily on phone and digital modes including PSK, RTTY, JT65, and OLIVIA. Without doubt the TS-990S is an absolute joy to operate. It is a very pleasing radio to which to listen, and the overall ergonomics and broad range of interface options make it a delight to work. It is by no means a perfect radio, and I will outline some of my issues with it during in this review. With that said, I would with no hesitation purchase this radio again.
I wish the eHam scoring system were more granular. Unfortunately giving the radio a 5/5 means a 100% score, and giving it a 4/5 is an 80% score. Neither of those are fair. I would lean towards giving the radio an A- or a score of 90 - 95%, so somwhere between a 4.5 & a 4.75
Earlier this year it looked as if I would sadly have to the sell my TS-990S. I went as far as posting the radio ontoQRZ.com and almost sold it a couple of times. Happily the circumstances that were forcing me to sell the radio were mitigated and I was fortunately able to keep it.
Overall the radio has a tremendous number of positives. However, nothing is perfect, and the TS-990S has it share of negatives including:
- The main display's panadapter is, in my opinion, inadequate. It is neither fine grained nor configurable enough to be of significant use except as a general guide to what is going on the band. It is quite annoying that I had to spend almost another $1,000 on an external SDR to get decent panadapter capability.
- No IF port which means that you have to split the output of the raadios RX-OUT port back into the RX-IN port and to whatever external panadapter you use resulting in a 3dB signal loss. This can be mitigated if desired with an active multicoupler, but it is a pricey option.
- The radio's rear video output port can only present a mirror display of the radio's primary display. This is basically useless, and in my opinion, and a waste of a monitor. (more on this later)
- Kenwood is slow with firmware updates. I suppose this is pretty standard for Japanese manufacturers, but when compared with way Elecraft keeps the K3 updated, it is a bit disheartening.
- Noise Blanker: This is a well known issue and one that can be quite annoying depending on the operating environment. Basically when a signal is stronger than the background noise, it will essentially render the noise blanker ineffective
- The radio has the capability of being connected to a network; however remote operation requires the use of a local PC.
- A more minor yet still irritating point: some configuration data not recalled between modes. For example when I switch from USB to USB DATA, I always have to remember to disable and renable my TX EQ when switching between modes.
SETUP
My station setup as follow:
Antennas: Traffie 5 band Hexbeam at 35ft, ground mounted Steppir BigIR vertical with 42 radials - used primarily on 40m & 6m .
Amplifier: Tokyo Hypower HL-1.5KFX 1KW solid state linear amplifier
Tuner: Palstar HF-AUTO
Panadapter: QSR1 SDR connected to the TS-990's RX-OUT via a Stridberg MCA102M multicoupler and a DX Engineering Receiver Guard 5000.
You can read more about my setup at http://w9tvx.com
RADIO FRONT PANEL
When you sit in from of a TS-990S, on of the first things you will are its two displays: a large touch screen to the left hand side of the radio, and a second smaller display in the middle of the radio. You will also be confronted with a plethora of knobs and button covering the face of the radio.
At first blush this all appears to be very overwhelming; however, the more time you spend operating the radio, the more you realise just how logically and well laid out it is. In fact it is not too long before you are rather instinctively able to reach for the desired buttons and knobs.
For example, want to operate split? Simple.
Right below the center display and above the tuning knob are all of the interface elements you need. They are grouped and labeled logically with the two lit buttons on the left indicating RX and TX status for the main VFO and two lits buttons on the right side indicating the same for the sub VFO. In typical operation, the RX and TX button for the main VFO are lit indicating that it is the one actively transmitting adn receiving.
- Press the M->S button immediately to the left of the main VFO RX/TX button to copy the frequency from the main VFO to the sub VFO. (You can avoid this step by having the sub VFO track the main VFO by pressing the tracking button)
- Next press sub VFO's TX button to enable transmission on the sub VFO. Right away the light on the main VFOs TX button will extinquish. A split LED right below the center display will light indicating split operation. The freqency display for the sub VFO will brighten an the one for the main VFO will dim in the secondary display. A delta offset in Khz from the main VFO will also be displayed (depending on how the operator has the secondary display configured). So immediate feedback on the radio status, and all the data you need to operate in split mode are presented.
- Use the sub VFO tuning knob to tune any desired offset (you can also enter offsets via the keypad). As you tune, you will see the delta from the main VFO change to it is easy to dial to the desired offset.
That's it. It takes a lot more describing it than seeing it in action.
I should add that if you have dual speakers connected to the TS-990S, by toggling the sub VFO's RX button you can configure the readio to split the audio from each receiver to each speaker. This is really handy in a pileup to either figure out at which offset the station is listening, or to time your call.
Another feature of the TS-990S that I find particularly useful is that the current passband lo/high cutoff or shift/width and filter effects are displayed on the subdisplay. Specifically, above the VFO frequency display there is a visual representation of the passband. If the notch or band elimination filter is active, you can also visually see which segment of the passband it is effecting. Any adjustments to the shift/width or hi/lo cutoff are visually represented, as are any changes to the notch/bef filter. In addition, there is a visualizion in the passband of the RF spectrum on receive and the transmitted signal spectrum on transmit in the same view. Really handy.
In fact the amount of useful information that is presented on the two displays is outstanding, and after becoming familiar with the radio, you can rapidly gather all salient operating data by just flicking your eyes across the displays.
The main display also has a bandscope and waterfall that I personally find of limited use. More on this in a moment. The primary display (the larger of the two) can be cycled through three main "panadapter modes": Bandscope, Bandscope + Waterfall, and none. In the Bandscope and none modes, the top half of the screen is filled with some really useful data such as current TX and RX equalizer settings, as well as multiple meter data including signal strength, power, swr, etc. In the Bandscope + Waterfall mode the bandscope and waterfall occupy 2/3 of the screen resulting in some of the more useful information being omitted.
Back to the bandscope: I don't think that the resolution is good enough. You can pick out the strongest signals and get a feel for the band, and certainly the touch screen is handly - although too coarse grained. However, it can't hold a candle to a dedicated SDR or the Elecraft P3. As a result, I spent a substantial amount of money to get a QSR1 and run it as panadapter along with HDSDR and SDRMAXV. I now leave the main screen in Bandscope mode as I don't lose any data by having it there and it's handly to see visually where I am on the band. The main display can also show a oscilloscope and audioscope at the push of the RF/AF softkey. Nice features though less useful if you have an SDR.
There are several other functions that the main display is used for including:
- Displaying signal information as well as decoded text in digital modes such as RTTY and PSK.
- Setting operating parameters such as filter width and depth, equalizer settings, and recorded messages.
- Navigating the menu system. Having such a large display makes it really easy to navigate and set menu items, simply because so much information can be displayed allowing for descriptive text that helps avoid having to break open the manual
The bottom line is that it is really nice to have such a big display as it makes operating and configuring the radio a cinch, and I am fond of the fact that many parameters for a given audio element can be rapidly accessed and manipulated without having to dive into the menu system. For example, pressing and holding the RX Equalizer button will open up an edit view in the main display. From this window you can switch to another equalizer preset or adjust specific equalizer frequencies for a preset. Another example is holding down the Band Elimination filter button. This opens up an edit window in the main display where you can change the width and depth of the filter. I should also note that you can even change the press/hold duration of the buttons before the edit window is opened
Turning to the TS-990S' menu system finds it very intuitive and easy to access and configure. I find the menu groupings to be logical making it quite simple to navigate to the desired menu item. I should add, that once I had setup my radio, I seldom find the need to go into the menu to change setting. In fact most of the operational parameters that you'd want to tweak on a dayily basis - such as filter cutoffs, equalizer settings, etc, are either directly accessible via buttons on the front panel or a simple button-press-hold away. Besides this, the radio allows for the user to switch between one of two configuration (although this requires the radio to reboot), as well as saving configurations to USB flash devices.
The TS-990S offers broad onboard support for digital modes such as RTTY and PSK, This includes onboard decoders as well as the ability to connect a USB keyboard for data input. To be honest, I find this of limited use as I use software packages such as DM780, fldigi, and WSJT-X for digital modes. The TS-990S does offer excellent support for these software packages with a Data mode as well as a built-in "soundcard" This means that you do not have to buy and have the clutter of an additional device, such as a signaLink. All you have to so is install the devices drivers provided by Kenwood.
BACK PANEL
---------
This is another area where I think the TS-990S shines. I'll start by pointing out that there are two CAT I/O ports: a USB port and a "legacy" DB9 port. In this day and age of digital connectivity, this is amazingly useful. At my station, I use the USB port to connect to a Mac Mini running Windows 8 and a host of software such as Ham Radio Deluxe, N1MM, Fldigi, WSJT-X etc. The DB9 port is used by my amplfier and Steppir SDA 100 controller to follow the radio as it changes frequencies and bands
In addition, the radio has both an optical input and output port. It is not uncommon for users to connect the optical output back into the optical input as a hack that will allow them to record on air audio an play it back.
Is it also possible to connect an external keypad with up to eight function keys that can be assigned to broad set of operations. There is an excellent commercial option available from Taylor Made RF in the UK, though it is also quite simple to build one
Network connectivity is provided by a rear RJ45 jack. This serves a couple of purposes: One is to synchronize the radio's clock via a network time server (NTP server), the other is allow remote control of the radio. A word on the latter: Unfortunately, in order to remotely access the TS-990S, you have to have a PC running Kenwoods ARHP software that acts as a relay between the radio and remote operator running Kenwoods ARCP software. I would much rather not require a PC running as well as the TS-990S - something that ICOM has managed to do.
Also featured on the back are both an RX-In and and RX-Out port. I have previously used a Pixel Technologies RF PRO-1B as an RX antenna. More recently I have connected a QSR1 SDR to the radio by splitting the RX-Out signal the SDR and back into the radio via the RX-In Port.
This highlights a notable shortcoming of the TS-990S: there is no IF Port included in the radio. Perhaps Kenwood engineers thought that this was an unecessary feature since the radio has a built-in panadapter. Fair enough I suppose; however, as I mentioned earlier I don't feel that the built-in panadapter is fine grained enough nor configurable enough to be wholly useful- certainly it is no match for my QSR1.
It sadly gets a little worse: There is also a DVI output on the rear panel, and one would think that this is an excellent opportunity to provide a rich panadapter experience on a nice large external monitor - much like the Elecraft P3 with the SVGA option. Unfortunately, all you get when you connect an external display is a mirror of the TS-990S' internal display at a paltry 800x600 resolution . In my opinion this is next to useless.
The radio also support four antennas. The antennas can be setup to automatically switch based on band. I personally only use one of the outputs as I use the antenna switcher on my Palstar antenna tuner
RECEIVER
I have found the TS-990S receiver to be more than up to the job. It is extremely pleasant to listen to - especially for long periods of time. In addition the plethora of DSP and filtering options make it a power to with which to pull out weak signals. The radio also includes a secondary receiver that is essentailly the same receiver from the 590S. This is a fine receiver; however, I wish that Kenwood had made the second receiver the duplicate of the first receiver much like the Elecraft K3. This would make diversity receiving much more viable, and it is disappointing that the flagship radio wouldn't have this capability.
In my opinion much has been made about the Sherwood receiver tables and the TS-990S. As has been previously pointed out the tables are sorted by third order dynamic range narrow spaced. This is but one parameter of many that must be considered when purchasing a radio. Bob Sherwood himself will tell you that as long as your receiver's value is above 85dB it is good enough, and other numerous other aspects of the radio should be taken into account with regard the purchase.
The TS-990S has two noise reduction filters. NR1 and NR2. I find NR1 to be absolutely outstand for helping manage band noise. Conversely I find NR2 to be next to useless as it overprocess the signal. Unfortunately the TS-990S' Noise Blanking function leaves something to be desired. It works quite well when there is no signal present above the noise floor; however, one a signal stronger than the noise floor is present, the noise blanker quits working.
For further noise and spurious signal elimination, the radio offers a number of filters including:
- narrow and wide notch filter and an auto-notch filter
- preselector
- 5 Roofing filters at 15kHz, 6kHz, 2.7kHz, 500Hz, and 250Hz. There is a slot for an additional roofing filter, though to date no one has yet produced one. The roofing filter can be manually or automatically selected by long-pressing the Fil/Sel button. This provides access to three RX filters profiles for which the Roofing, IF filter shape and AF filter width can be set. You can also set the Hi and low cutoffs for the passband for each of the three filter profiles.
- Band Elimination Filter that can change bandwidth and attenuation at the IF stage. The user can set the width and depth of the filter by long-pressing the BEF/SEL button. The width can be set from 300-1200Hz in 100Hz steps and the depth can be set from 20-80dB in 20dB steps. I find this to be a really powerful tool and have turned to it quite frequently.
- Two beat cancellers. One desgined to supress weak continous signals, and the other to supress intemittent signals.
Another highly valuable feature is the TS-990S' RX Equalizer. The equalizer function provides ae 6 built-in settings and three user settings. Operators have access to 18 bands to help customize the receive sound to their hearts content. This is really handy when using different speakers e.g. headphone vs external, as well as for different band conditions and operating modes.
Overall the radio makes it a breeze to pull out weak stations and to deal with strong adjacent signals, as well as noise on the band
TRANSMITTER
Besides the excellent audio for which Kenwood is known, the TS-990S also provides some features to help the operator optimize his transmitted signal.
Out of the gate, the radio is capable of outputting 200W that is adjustable via a front plate pot. The main display also presents the current setting so you always know how much power the radio can be outputting at a glance.
Beyond that, in SSB mode, the are up to 3 TX filters available for each of which the high and low cutoff can be specified. So it is possible to have a narrower setup for contesting, a wider setup for rag chewing, and so on.
Additionally, there is a very capable TX Equalizer that mirrors the RX equalizer. The TX Equalizer provides the operator with 6 built-in setting and three user settings. As with the RX Equalizer, operators have access to 18 bands to help customize the receive sound to their hearts content. This makes it possible to customize audio output for different microphones and operating conditions.
The radio also includes a speech processor that compresses audio based on input and output parameters that are adjusted by means of two pots aptly named PROC-IN and PROC-OUT. In addition it is possible to adjust the effect of the processor by selecting either a "hard" or "soft" option. It is also possible to visualize amount of compression in dB on the radio's meters.
I should add that the sub-display will display a spectral graph of TX audio in transmit mode, as well, by pressing the RF/AF button the main display will present an audioscope and oscilloscope displaying the transmitted signal
Connecting K3S to 1.3K-FA